Darkness falls across the land... The midnight hour is close at hand... Creatures crawl in search of blood to terrorize ya'lls neighborhood...
This time around I decided to pay tribute to the werecat created from Michael Jackson's Thriller. The werecat, along with all of the zombies in the video, were originally made by Special makeup FX master Rick Baker. This project started a little later than I wanted due to a very heavy Halloween schedule, but I dove into it with hopes of finishing it before Halloween. Needless to say, I failed at meeting the deadline, but was satisfied with the progress. Maybe you'll find it interesting or maybe you're not interested at all. Either way, I took the time to document it so here's how it happened- free of charge. Bare with me. "I'm Not Like Other Guys..."
The first thing I did was order a wig and hoodie, along with a gallon of Slip Cast latex and some white yak hair. I also used some black synthetic hair extentions I had lying around for another project. Then, of course, I began to sculpt.
As a base I used an old lifecast I had from a alien movie that never happened. There was also a couple of holes in the head where horns were mounted for another project, but back to this project.
I used WED clay (water based) to build it up quickly.
With the correct reference, getting the basic form was relatively quick.
I had to readjust some symmetry and scale.
With the basic form settled, I began to concentrate on smoothing and refining.
Beginning to add details... wait a second.... doesn't he have ears?
Instead of completing the head sculpt, I went ahead and added ears. The ears and chin were separate in the original makeup but this was only intended to be a halloween mask with no time to spare, so give me a break! I was under the gun!
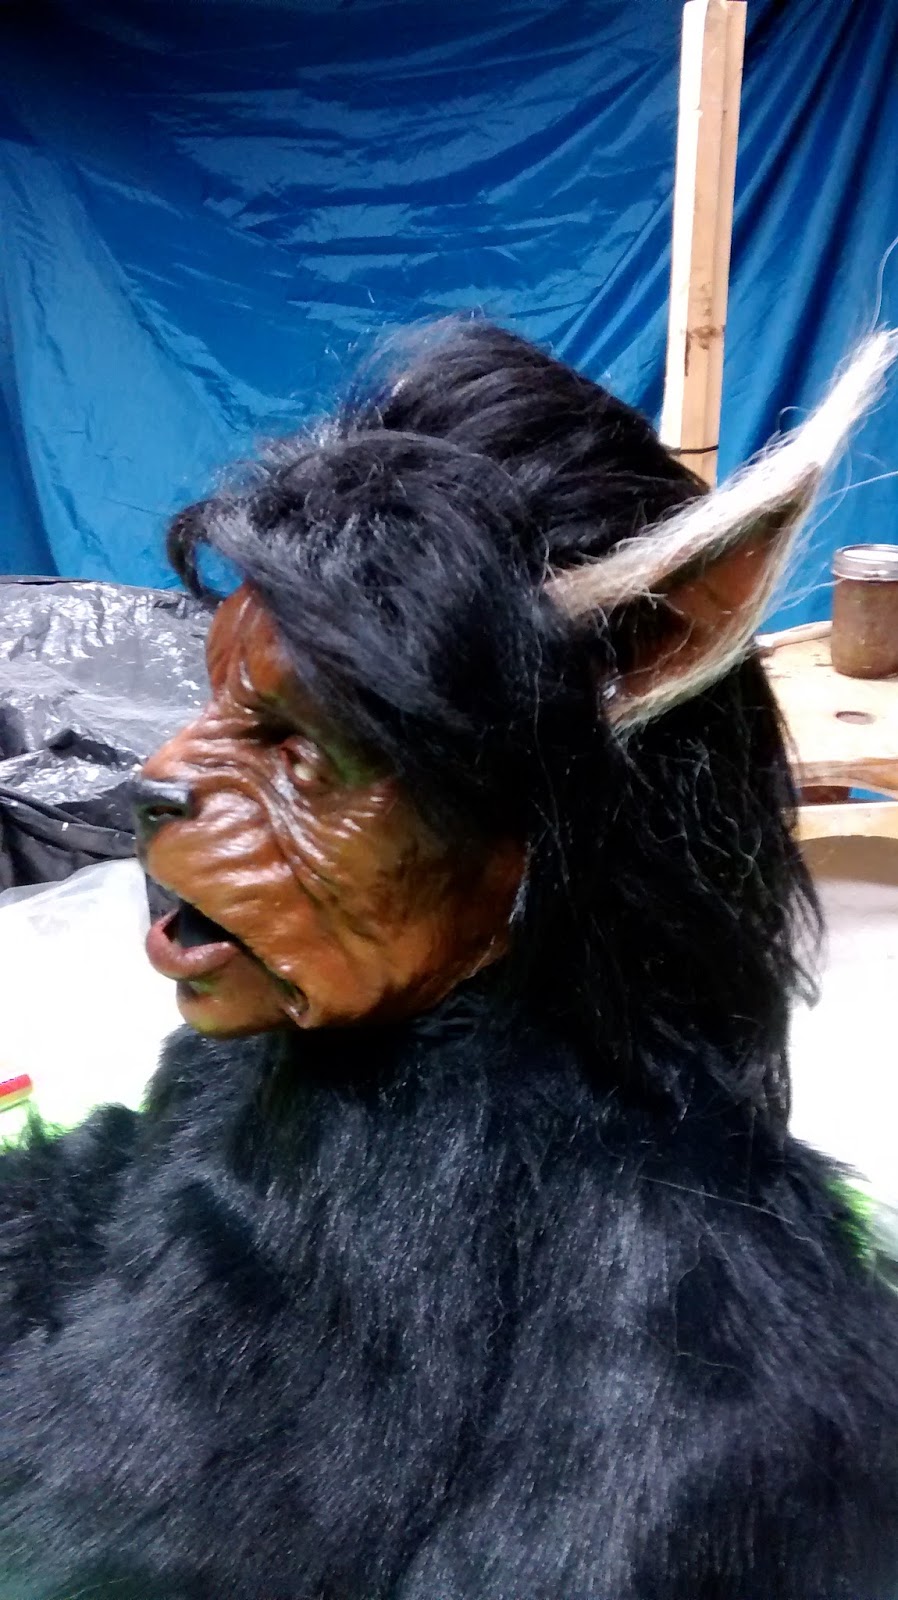
The sculpture needed some more work and some detailing but I gave up for the night and took the pictures below instead. As you will see, I took many pictures. No wonder I didn't finish it in time...
Since I knew the ears would be covered in Yak hair I didn't go too crazy with them. Time was running out and I had to call it a night.
Ok, due to time I had to move on. The next night I started creating the separation wall for molding. Again, time was my enemy and I only planned to mold the front half of the head and use a cowl and wig as the back half of the mask. I would however need to mold the back half of the ears...
I added some keys and the wall was done. Time to slap some stone on that wolf!
I used Hydrocal White stone to mold the piece because it was what I had and I didn't have time to get more. Hydrocal is what is used for professional mask production when casting latex due to it's porous attribute, which absorbs the moisture and allows the latex to be pulled quickly. Quick is what I needed for this impossible dream.
I let it set and then pulled the mold apart. You can see the molds of the back of the ears on the left side of the picture below.
I cleaned out the leftover clay from inside the mold and got it ready for casting. I then poured latex in and awaited the birth.
Moving on, I got the headcast prepped to attach my mask (since it is essentially a half-mask with no back).
The flashing needed to be removed, but the werecat was coming along nicely. I considered this latex casting a test I could try the paint job on before doing the final mask. I also laid some black fur I bought from JoAnn's across the chest. Now we're talkin'.
Then the true horror struck. I placed the cheap wig I bought from Amazon upon the head. Now I was getting worried. But still, I had hope, though it was the size of a flea's pinky toe.
Why do I do things like this? Why couldn't I do this better? I put the mask on. Like, zoinks! Anyway, it fit well. I placed a clear vacuum-formed plastic piece in the mask's left eye to check if I could see through it. Success! I could see, but it was blurry. And to my delight, it didn't fog up from my breathing because the opening in the mouth is large enough for air flow.
Next, I placed the wig on the head and added some halloween store bought plastic teeth into the mouth to see how it was shaping up. I also added some Yak hair for the white stripes on the sides of the head.
I found a costume jacket on ebay and layed it down for effect. I think this just might work!
So I moved on to the hands. I started with hand castings made from Ultracal 30. I used WED clay to slap the clay on and used a picture of the original scultpures I found online for reference. Below is the progression. I already had the claw which I had molded for another project. I simply reproduced ten of these in casting resin.
When I got these sculpted I went ahead and built a separation wall to divide the final mold into two halves - the top of the hand and the palm side. I used white clay to build the wall and used Hydrocal to mold them, one side at a time. Them I removed the sculptures and straped the two halves of the empty mold together. Using Hydrocal to make a two piece mold is tricky because the material will shrink as it cures. This can cause a bad seam with every casting. But as I mentioned, time was of the essence and I didn't have much choice.

The next night after the mold had cured and cooled down (these stone materials generate a lot of heat as they cure) I prepared the molds to cast with latex. I cleaned out any excess clay from the original sculpture and then straped them back together. I then leaned it up against the table like a giant cup and filled the mold with slip cast latex. I let the latex set in it for about 30 minutes then poured the rest back into the container. The longer you leave it setting in the mold, the thicker the final product will be. I sculpted the gloves really thin and I knew the latex castings would shrink. I needed these gloves to be somewhat thin to I could slide them onto my hands and they would appear tight.
Ok, the next night I opened the molds and the glove castings looked great! I just needed to remove the flashing along the seam line, add the claws and paint these suckers up!
But before I could do the finishing work I had to try them on. I trimmed down the flashing and jammed the claws into the finger sockets. Besides a little wrinkling around the wrist, it seemed to work pretty well.
Ok, since that part of the project was under control, I returned to the head. For the eyes I did a test for the eyes. Since I would be wearing this at work, I would not be able to use contact lenses because I would have to remove the mask several times throughout the day. To solve this, I vacuum formed half-spheres with clear plastic. To create the pupil I cut a piece of electrical tape out in the slit shape and placed it inside the half-sphere as a stencil. Then I simply use yellow spray paint and removed the tape when the paint dried. This left a clear slit pupil to see through after I cut them and fit them into the mask's eyes. Problem solved.

Next, I needed to come up with some fangs since I didn't sculpt them into the mask. To begin, I needed a form to sculpt on so I covered the lower half of the lifecasts face with cellophane and pressed some WED clay over it. Then I removed it and poured some plaster in, which gave me a copy of the mouth and chin area. I made some teeth out of Sculpey III, which gave me an idea of how big to make the teeth because what I made was much too cartoony! They rested on the chin and the upper teeth would rest along the upper lip area.
Once again I did a quick test to see how it was coming together. I also stuck an old nylon guitar string into his muzzle to test out the whiskers. The teeth were still a bit too large, so I was going to have to resculpt those again.
Ok, let's move on. I was eager to see this thing come together. I based out the mask with rubber cement paint.
Since I had two, I painted them both. I also went ahead and added some more variation to the colors using alcohol based acrylic inks (although due to the lighting you can't see it very well in these pictures, sorry).
After that was done, I sealed the masks with a flexible glue thinned with water. It's shiny because it's wet!
Here's another horrible photo for you! At least it was looking a little bit more like the werecat... humor me please.
I also painted the hands...
Hair and wig back on, it looked as good as I could have hoped. The sealer was still damp and shiny.
At this point I just had to put it on again and try out the eyes. Underneath, the lower portion of the black hood is pulled up to cover my mouth. I could see through the eyes well enough to get around.
Now for some hair, I went ahead and used Barge to glue some yak hair onto the ears.
I continued to attach white yak hair to the sides of the head and the chin. I also added some black fur to help fill out the areas where the wig didn't reach. Sorry about the green cardboard on the table reflecting and distorting the colors in the picture.
With the other side on it began looking better. I still planned on punching hair into the hairline so it looked a bit more realistic.
But before I refined the hair work, I went ahead and punched holes to secure the whiskers into his muzzle. As I mentioned, I used some old used classical guitar strings as the whiskers. Rick Baker (the fx legend that created the original makeup for Thriller) told me that they used thick monofiliment and sanded it down to taper to a point. This proved difficult when I tried this with the guitar strings, so I just used an X-Acto knife and cut them to a point. If I had more time on this project, I would have approached a lot of things differently.
Moving back to the hands, I went ahead and attached the claws. They fit quite snug in the latex gloves and didn't require much more than superglue to lock them in. I painted them a bit and glued a fur sheet around the wrist.
Then I added some black fur strands to blend the sheet fur a bit better.
Ok, I had to put it on again so see the progress... The hands worked well, though the claws weren't quite accurate. They should have a slit sculpted underneath, more like a cat's claw. I could see this in the reference photos. But for Halloween, let's call it done!
Once I got that out of my system, I finally went ahead and sculpted some more fangs.
Then I cast them in resin.
Then I painted them and glossed them. I also attached them to the vacuum-formed pieces of the upper lip and chin.
The reason I attached the teeth to the vacuum-forms was to glue them to the hood underneath.
The mask was looking better with these teeth. It still needed some hair work and to repair the corners of the mouth where I cut them.
I added some latex to fill in the gaps I created to give the mouth more stretch. I don't think I could lip sync to Thriller, but at least I could open my mouth to growl. After the latex dried, I touched up the white areas with some paint. I also went ahead and glued on some fake eyelashes for more realism.
Finally completed, this was the result:
I also attended a charity event that weekend called Thrill the World where a bunch of dead folks were dancing.
I hoped you enjoyed this edition. More to come as I put things together!
In the meantime, please follow me online on your favorite social media and let me know what you think! I'm currently making a lifesized art piece and will be blogging about that when it's completed.
Please stay tuned!
-z
The Last Tidbit:
Special thanks to Rick Baker for his help and kind words. You can find photos of his incredible Halloween makeups and other work on his Twitter page here:
https://twitter.com/TheRickBaker